Imagine this: you’ve found the perfect design for a box or a 3D puzzle, originally designed for 3mm plywood. You open your workshop drawer, but you only have 6mm material on hand. What should you do? Redraw every single slot and tab by hand? Absolutely not!
There is a clever, quick, and simple trick: proportional scaling. Let’s look at how this works in any vector editor (like CorelDRAW, Adobe Illustrator, or Inkscape).
The Core Secret: The Rule of Proportion
A vector design is not just a picture; it is a mathematical model. If we scale the entire design together, all of its parts change size equally.
To find out how much you need to scale your project, just divide the new (desired) thickness by the old (original) thickness.
The “New Divided by Old” Formula:
Scale Factor = New Thickness / Old Thickness
Popular Examples:
- From 3mm to 6mm: $6 / 3 = 2$. This means you enlarge the design exactly 2 times (or to 200%).
- From 4mm to 8mm: $8 / 4 = 2$. Also an increase of 2 times (200%).
- From 4mm to 3mm: $3 / 4 = 0.75$. This means you downscale the project to 75% of its original size.
Step-by-Step Guide (Using CorelDRAW / Illustrator)
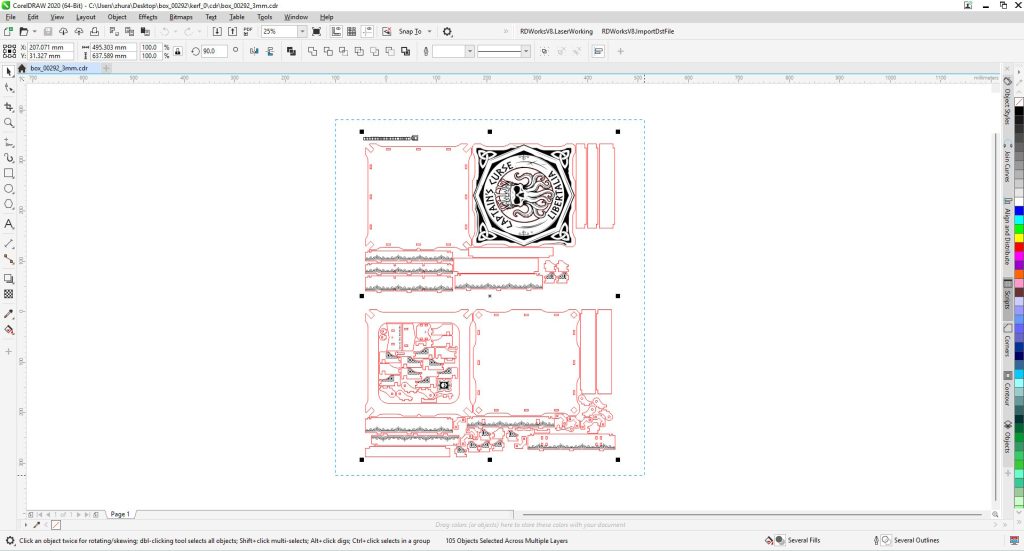
Step 1. Select EVERYTHING
Open your file. It is crucial to select absolutely all the pieces of the project at the same time. If you leave out even one small part, it won’t fit during assembly.
- Shortcut: Ctrl + A (Select All).
- Pro Tip: If the parts are scattered, it’s a good idea to temporarily group them together (Ctrl + G).
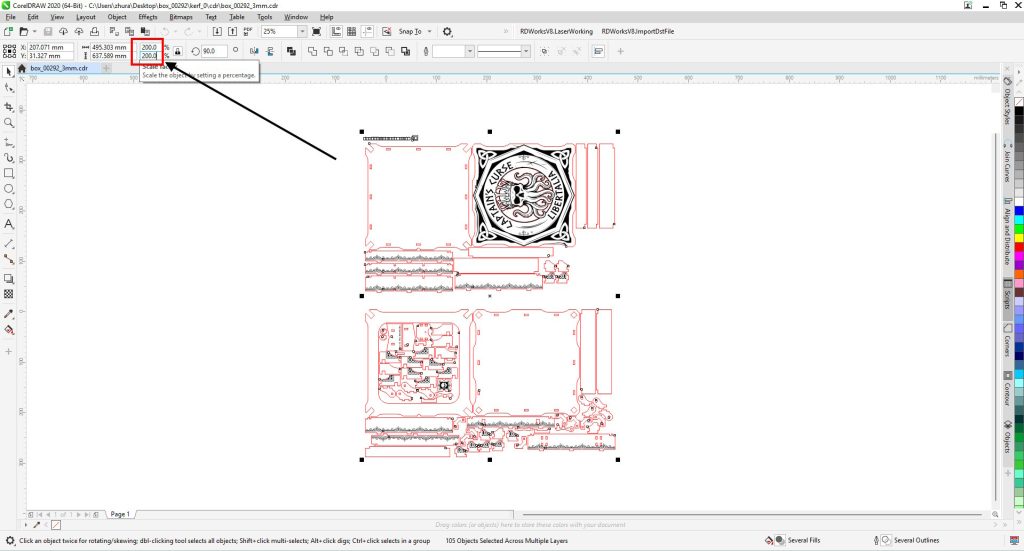
Step 2. Locate the Size & Proportion Panel
Look at the top toolbar. You will see fields showing the dimensions of your selection in millimeters and percentages, right next to a padlock icon (Maintain Aspect Ratio).
- Make sure the “padlock” is locked! It must be active. This ensures that when you change the width, the height adjusts automatically, preventing your design from warping.
- Go to the percentage field (where it says 100%) and type in your calculated scale factor. For example, type 200 to go from 3mm to 6mm.
- Press Enter.
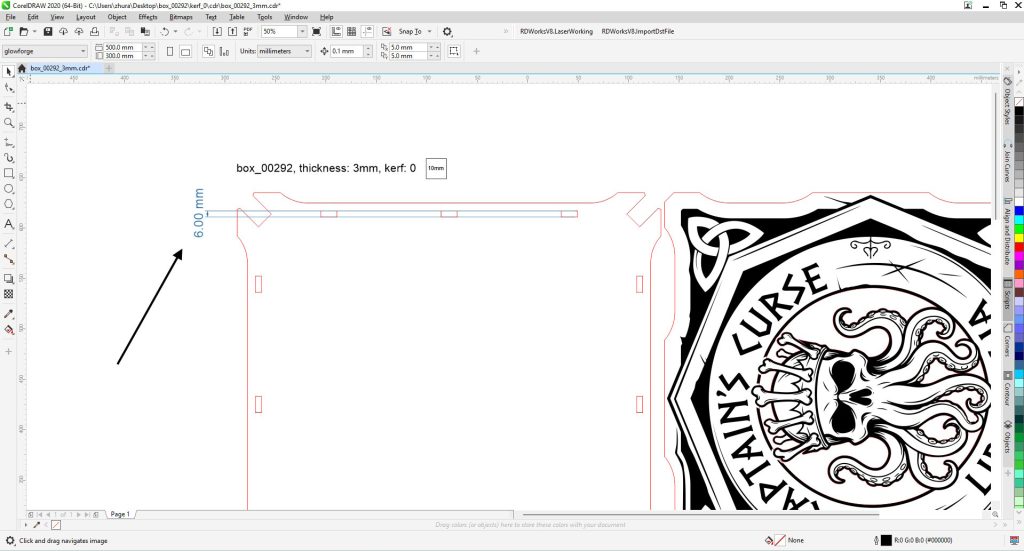
Step 3. Double-Check a “Control Point”
To make sure everything went smoothly, find any slot (the hole where another piece inserts) and measure its width using the measuring tool or by checking its object properties.
- If the original slot was 3mm, it should now measure exactly 6mm.
- If the math checks out, congratulations! Your file is ready for the laser.
Important Pitfalls (Keep These in Mind!)
While this method is incredibly fast, it comes with two side effects you should expect:
- The final product’s overall size will change!If your 3mm plywood box was originally 10×10 cm, scaling it up for 6mm material will turn it into a 20×20 cm box. It will be twice as big, chunkier, and heavier.
- Laser Kerf.The laser beam has a physical thickness (usually around 0.1mm). When you scale a design up significantly, the joints might feel slightly looser than the designer intended. If you need a tight, snap-fit joint, it is always best to do a quick test cut on a couple of interlocking parts first.
When Does This Method NOT Work?
If you need the box to stay exactly 10×10 cm, but you still want to make it out of thicker material, this method will not work. In that scenario, you would need to use parametric design plugins or manually resize only the slots and tabs, keeping the outer dimensions intact.
However, if the overall size of the finished item isn’t critical for your project, scaling will save you hours of tedious editing!