How to Prepare a Photo for Laser Engraving: Size, Dithering and Every Setting Explained
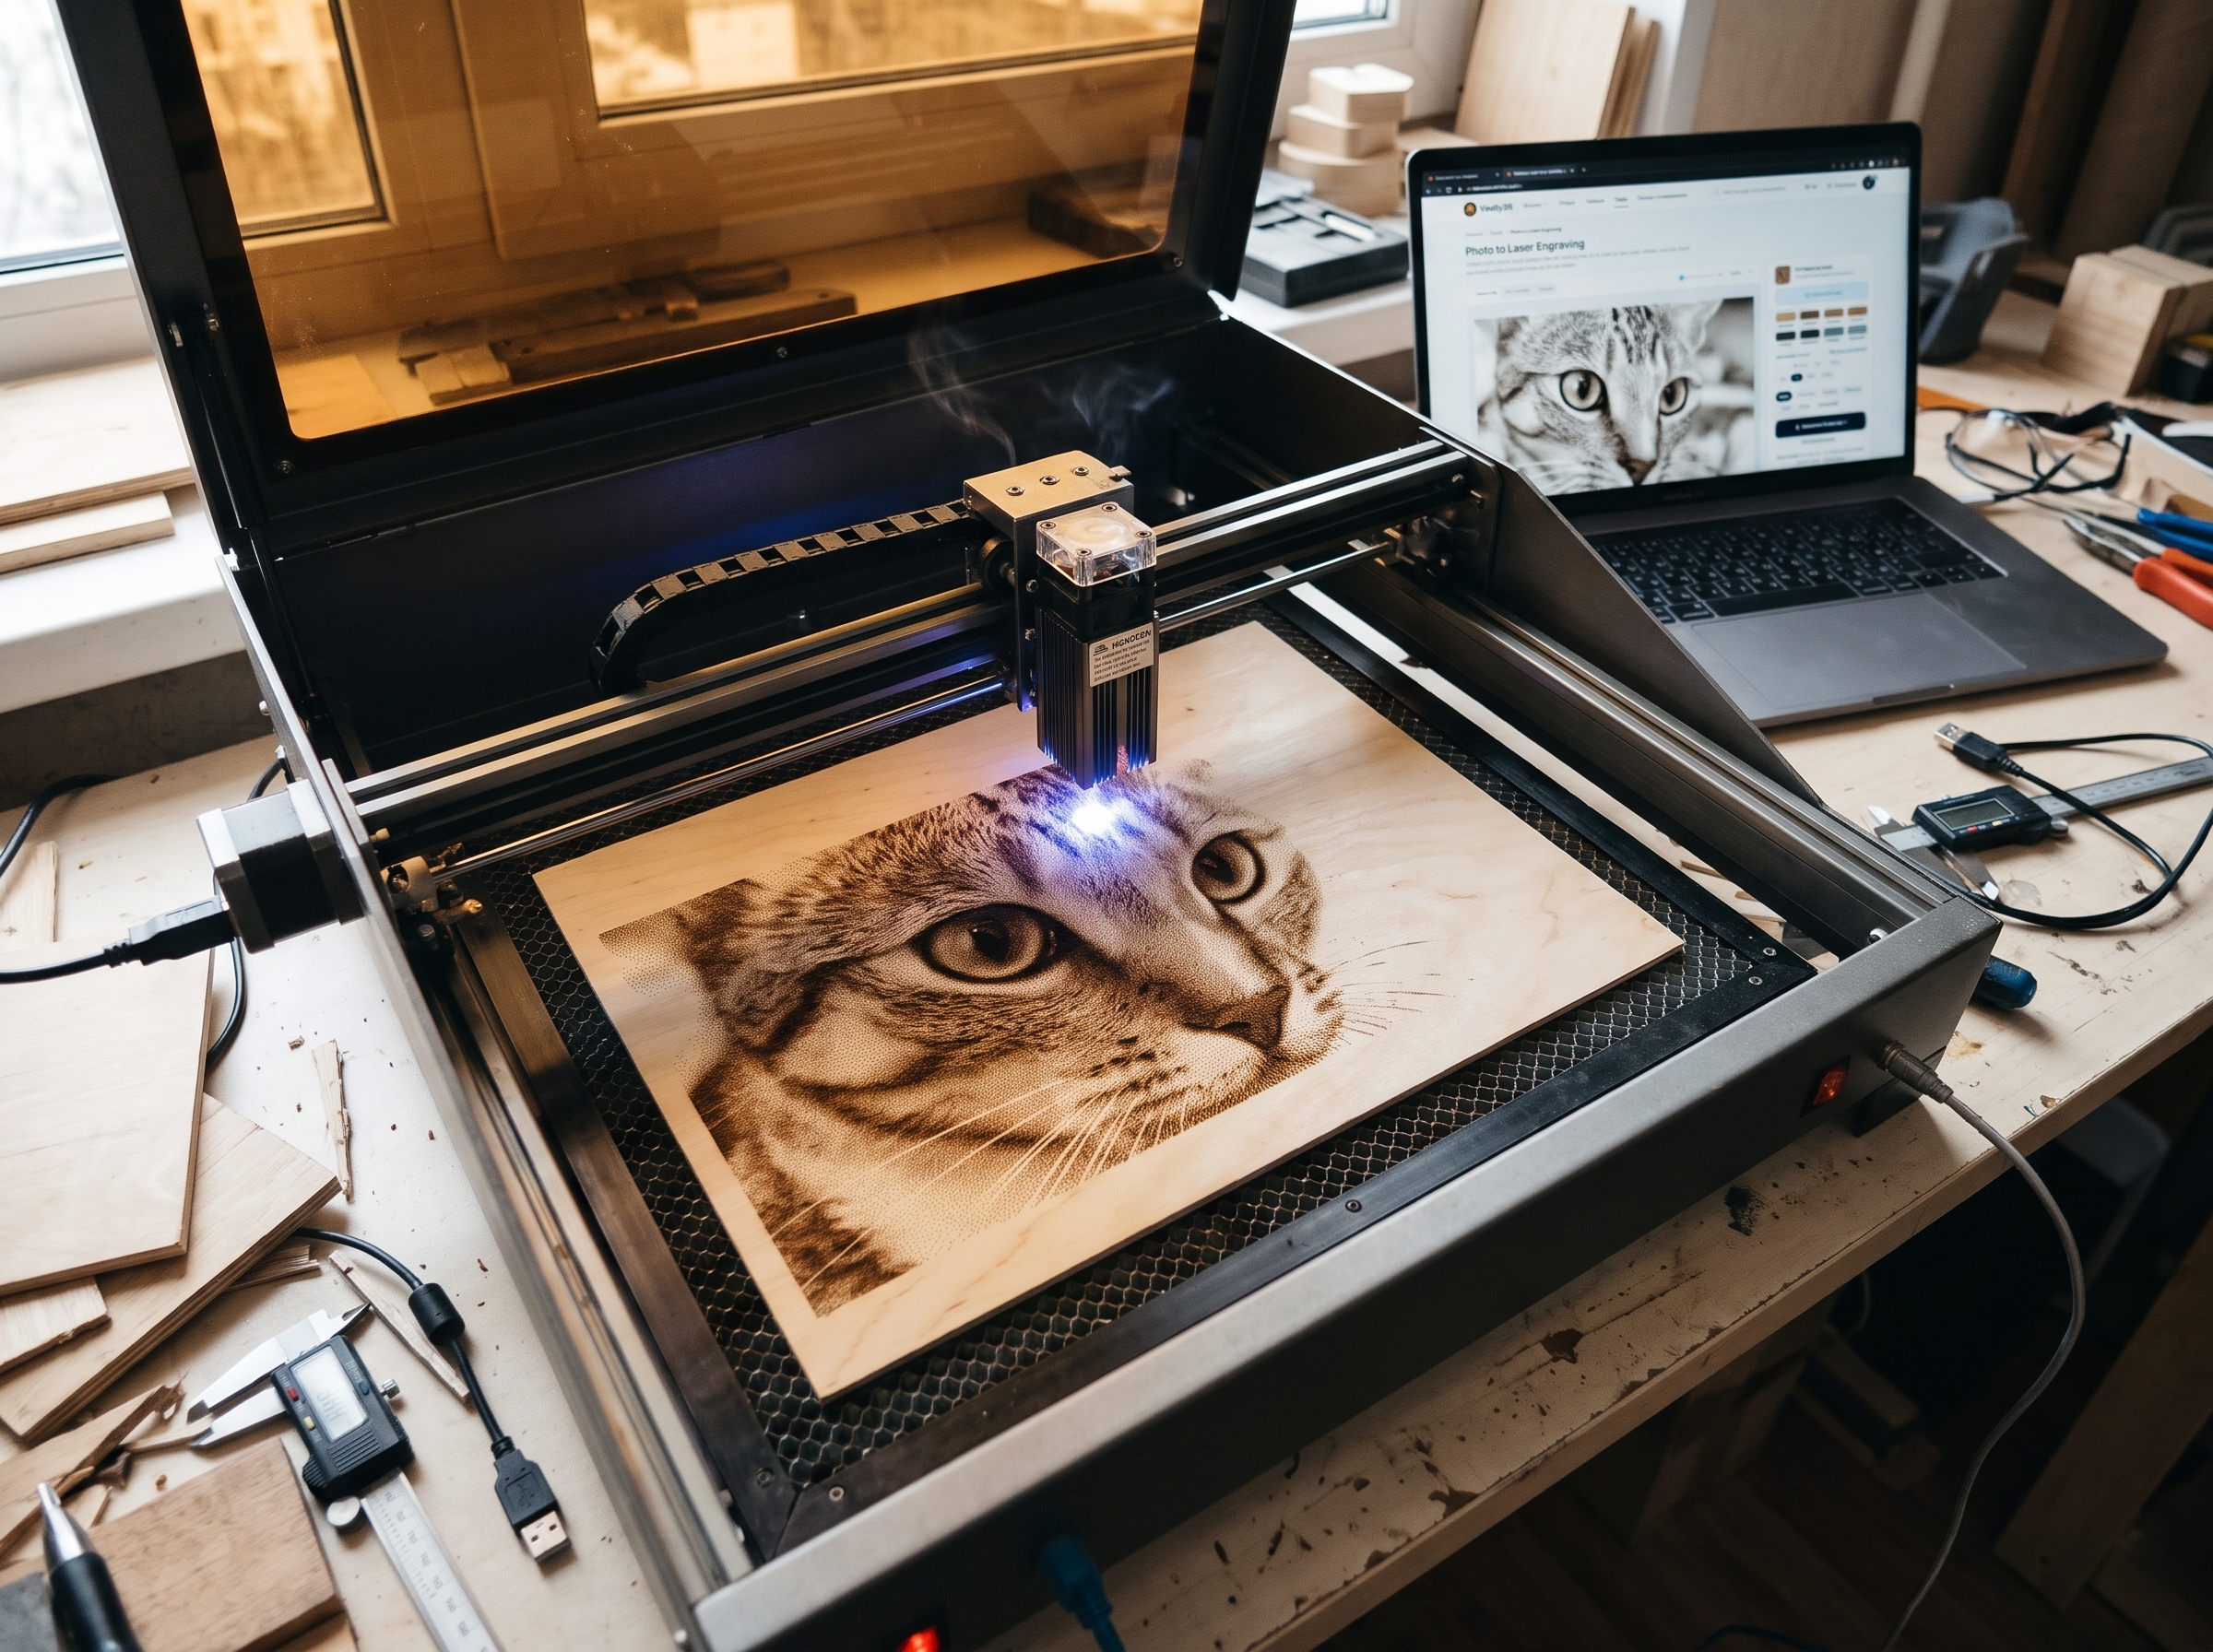
Our free Photo to Laser Engraving tool turns any photo into a black-and-white file your laser can burn straight away. Most of the work is automatic: pick the material, set the size, download. This guide explains why it works the way it does — and what every setting means, for the moments when you want to fine-tune the result.
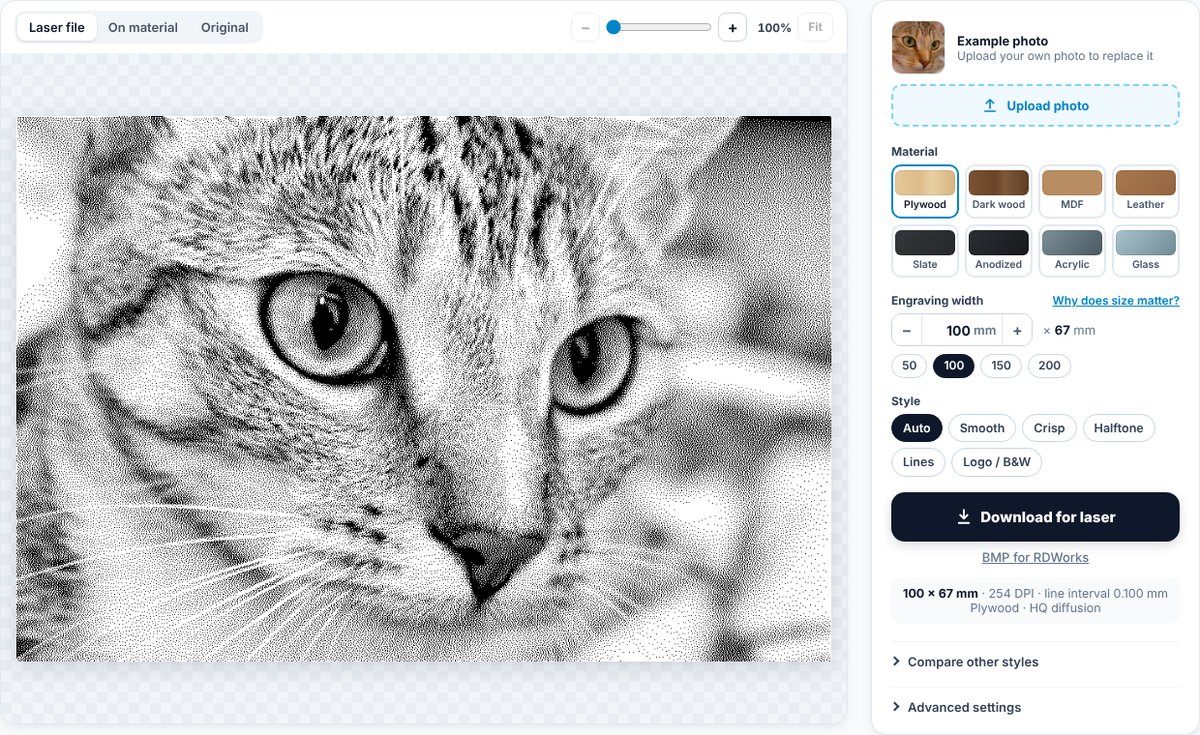
Quick start in five steps
- Upload a photo. Click Upload photo, drag a file onto the preview, or paste an image with Ctrl+V. The tool opens with an example cat photo so you can try everything first.
- Choose the material. Plywood, dark wood, MDF, leather, slate, anodized aluminium, acrylic or glass. Resolution, tone and burn spread are set for it automatically.
- Set the engraving width in millimetres — the real size on your workpiece. The height follows the photo.
- Check the preview. Laser file shows the exact black-and-white pixels, On material shows how it will look after burning.
- Download for laser and import the file into LightBurn or RDWorks without scaling it.
How a laser engraves a photo
An engraving laser moves back and forth across the material, one line at a time, like an old printer. The distance between two lines is the line interval (scan gap). For wood a typical value is 0.1 mm, which equals 254 DPI. On every line the laser can do only one thing at each point: fire or not fire.
So an engraving is a grid of tiny dots. A 100 mm wide engraving at 254 DPI has exactly 1000 dots across. The best file for the laser has exactly the same grid: one pixel = one laser dot.
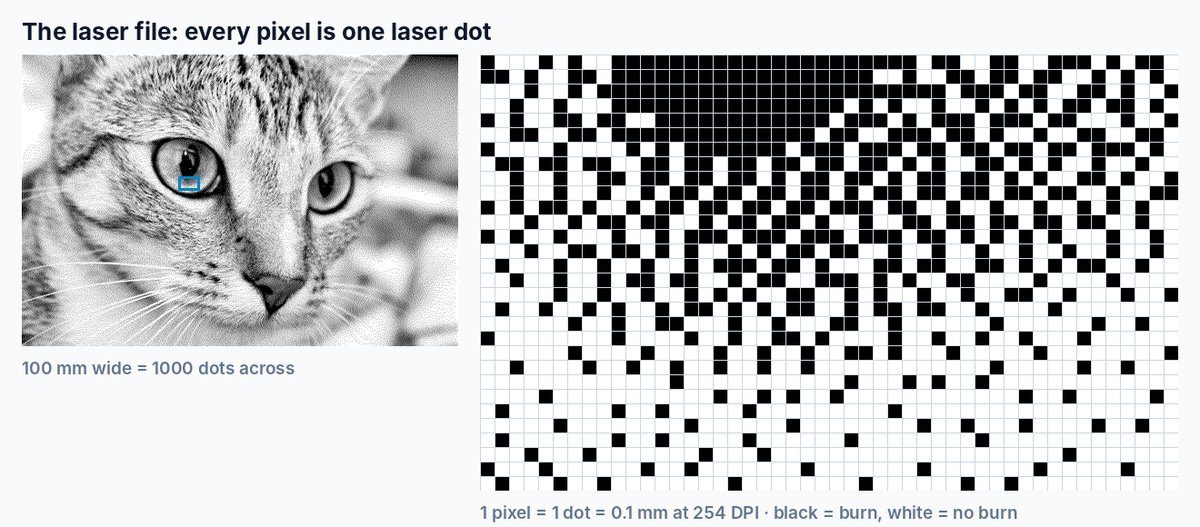
Most CO2 and diode lasers cannot reliably burn shades of grey: wood either darkens or it does not. Photos are therefore converted to pure black and white with dithering — dark areas get many dots, light areas few. From a normal viewing distance your eye blends them back into smooth tones, like a newspaper photo.
Why the size has to be set first
Dithering only works when each dot of the pattern lands on its own laser dot. If you dither a photo at 50 mm and stretch it to 120 mm in your laser software, every dot becomes 2–3 laser lines thick. The fine pattern turns into blotches, stripes and moiré, and the tones are lost. Shrinking is even worse: neighbouring dots merge into black patches.
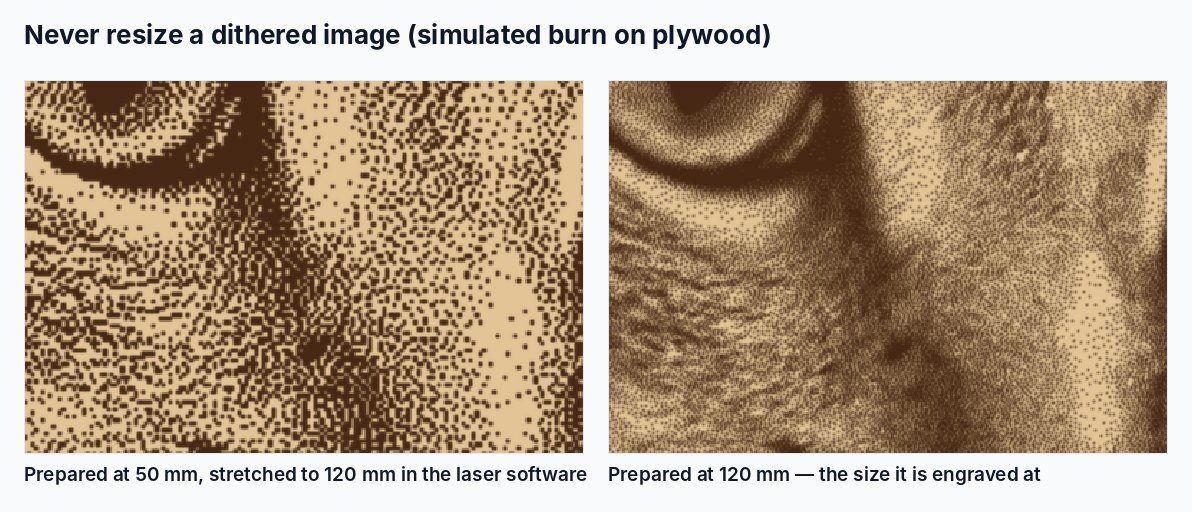
That is why the tool asks for the size before anything else. It resamples your photo to the exact number of laser dots and dithers it on that grid. The downloaded PNG carries its resolution inside, so LightBurn and RDWorks place it at exactly the width you chose. Need another size? Change the width in the tool and download again — it takes a second.
Burn spread: why the file looks paler than the result
A burned dot is always a little larger than the laser beam — heat spreads into the wood fibres. Dots that should cover 20% of an area end up covering 30–40%. Without compensation every engraved photo comes out too dark and the shadows merge.
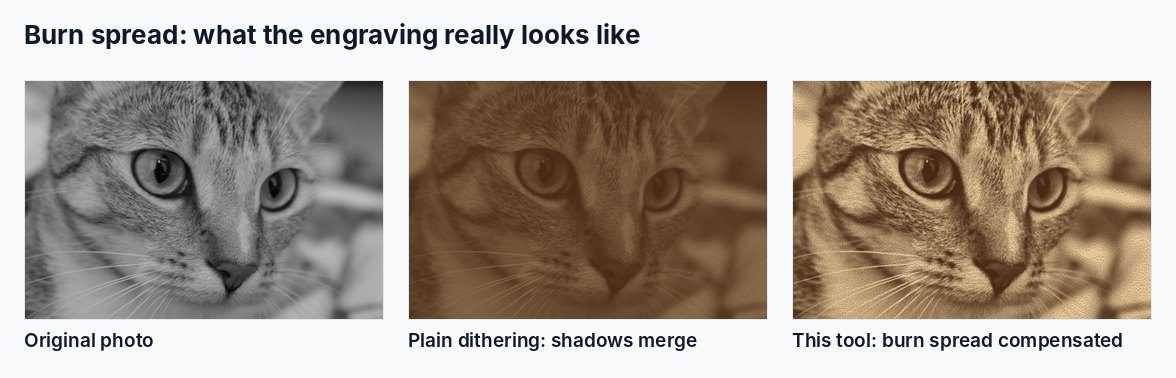
The tool simulates the burn spread of the chosen material at the chosen resolution and adjusts the tones before dithering. That is why the Laser file view may look light on screen, while On material shows what you will really get.
The main settings
Photo
JPG and PNG work best. The thumbnail shows the current photo with its size in pixels; Upload another photo replaces it. Your photo is processed in your browser and never uploaded anywhere.
For full detail the photo should have at least as many pixels across as the engraving has dots: width in mm × 10 at 254 DPI (a 150 mm engraving → about 1500 px). Smaller photos still work but look softer.
Material
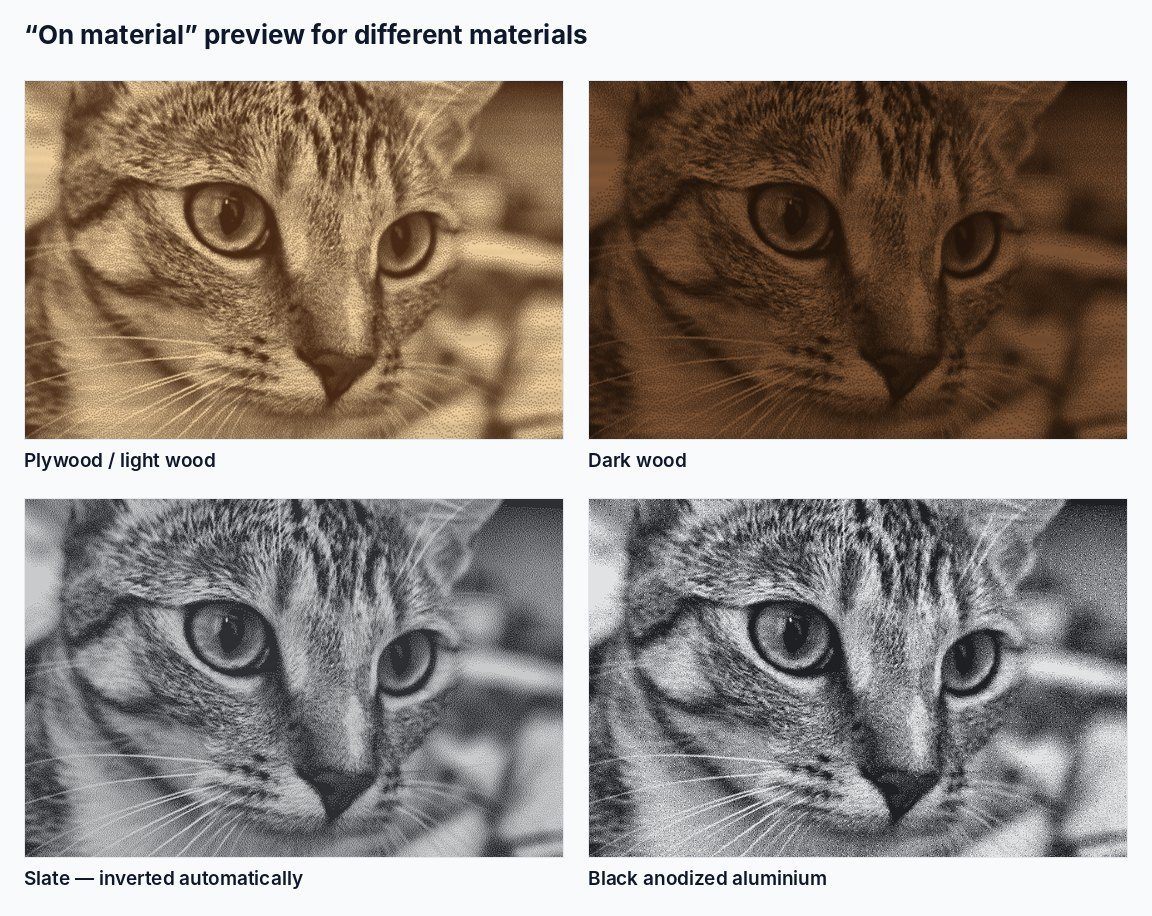
Choosing a material sets the resolution, the burn spread compensation, how strongly local detail is enhanced, and whether the image is inverted:
- Plywood, MDF — 254 DPI (0.1 mm). The standard for light woods.
- Dark wood, leather — 200 DPI (0.127 mm). The burn spreads more, so fewer, larger dots stay cleaner.
- Slate — 254 DPI, inverted: the laser makes light marks on a dark surface, so it burns the light parts of the photo.
- Black anodized aluminium — 400 DPI, inverted. Almost no spread, very fine detail is possible.
- Acrylic, glass — 300 DPI, inverted (the marks are frosted white).
Engraving width
The real width of the engraving on your workpiece, in millimetres. Use − and + (5 mm steps, hold to repeat), type a value, or pick 50 / 100 / 150 / 200. The height is shown next to it and always follows the proportions of the photo.
Style
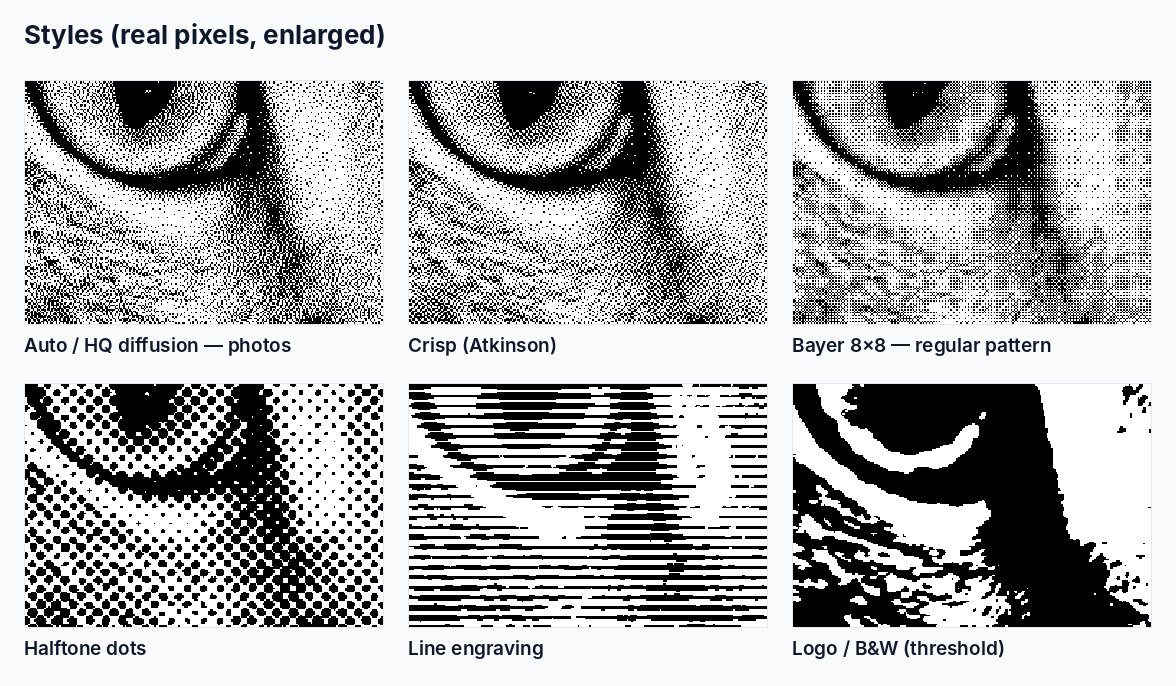
- Auto — the recommended choice. Photos get smooth HQ diffusion; logos and line drawings are detected and kept as crisp black and white.
- Smooth — HQ diffusion for photos even if the tool thinks it is a logo.
- Crisp — Atkinson dithering: stronger contrast and very clean highlights; good for faces with soft light.
- Halftone — round newspaper dots. Works well on diode lasers and with coarse settings.
- Lines — lines of varying width, like a banknote engraving.
- Logo / B&W — pure threshold, no dots at all: for logos, text and silhouettes.
Preview and zoom
- Laser file — the exact black-and-white pixels you will download.
- On material — a simulation of the finished engraving, including burn spread and the material colour.
- Original — your photo at the output size, for comparison.
Zoom from 100% (fit) to 400% with the slider, the − / + buttons or Ctrl + mouse wheel; drag the enlarged image to move around. Fit returns to the whole picture.
Download
Download for laser saves a 1-bit PNG with the resolution written inside — best for LightBurn and most other programs. BMP for RDWorks saves the same image as a 1-bit BMP. The file name contains the size, DPI and material, for example cat_100x67mm_254dpi_ply.png. The line under the button repeats the size, DPI and line interval to use in your laser software.
Compare other styles
Opens small previews of every dithering method for one area of the photo. Click the main image to choose the area — handy for checking an eye or a face up close. Click a preview to use that method.
Advanced settings

Size
- Height, mm — set the height instead of the width. With Keep proportions on, the other side follows; turn it off only if you really want to stretch the photo.
- DPI — the resolution of the file. The line interval below it is the same value in millimetres (25.4 ÷ DPI). Use exactly this interval in your laser software. Change it only if your machine engraves better at another interval.
Fine-tune
All sliders start at 0, which means “automatic”. They shift the automatic result rather than replace it.
- Brightness — makes the whole engraving lighter (right) or darker (left).
- Contrast — more or less difference between light and dark areas.
- Detail — local contrast: brings out texture in fur, hair and fabric. Too much makes smooth backgrounds blotchy.
- Sharpness — crisper edges. Lower it for noisy phone photos.
- Burn spread — how much the dots grow on your material. If your test engraving comes out too dark, move it right; if too light, move it left. The On material preview follows this setting.
- Clean tones — removes single stray dots in light areas and fills almost-black areas solid. Move right for cleaner highlights, left to keep the faintest details.
- Reset to automatic — puts every slider back to 0 and restores the material defaults.
Invert, mirror, rotate
- Invert — burns the light parts instead of the dark ones. Switched on automatically for slate, anodized aluminium, acrylic and glass.
- Mirror — flips the image horizontally. Use it when you engrave clear acrylic or glass from the back, so the picture reads correctly from the front.
- Rotate 90° — turns the photo; width and height swap.
Dithering method
The full list behind the Style buttons:
- HQ diffusion — Jarvis error diffusion with serpentine scanning and a touch of noise: smooth tones without “worm” patterns. The default for photos.
- Atkinson — crisp, high contrast, clean highlights.
- Floyd–Steinberg — the classic fine grain.
- Stucki, Sierra — smooth alternatives between Floyd–Steinberg and Jarvis.
- Bayer 8×8 — a regular cross-hatch pattern that burns very evenly.
- Halftone dots — with Dot step (distance between dots in mm), Angle and Dot shape (round, diamond, square, ellipse).
- Line engraving — with Line step (distance between lines in mm), Angle and Wave (makes the lines undulate).
- Threshold (B&W) — with Threshold: everything darker than this value is burned. Set automatically for logos.
Settings in LightBurn and RDWorks
- Import the PNG (LightBurn) or BMP (RDWorks). Check the size — it should match the tool. Do not scale it.
- Set the image mode to Threshold or Pass-Through. Do not use Dither, Jarvis, Stucki or Grayscale in the software: the image is already dithered, and dithering it twice ruins it.
- Set the line interval (or DPI) shown under the download button.
- Engrave a small test on a scrap of the same material, then adjust Burn spread if needed.
Troubleshooting
- Too dark, shadows merge: move Burn spread right, or lower the laser power.
- Too light, washed out: move Burn spread left or raise the power slightly.
- Stripes or moiré: the image was scaled in the laser software, or the line interval does not match the file. Re-download at the right size and use the shown interval.
- Soft details: the photo has too few pixels for the size — use a larger photo or a smaller engraving.
- Busy background: crop the photo or choose one with a calmer background; a plain background makes the subject stand out.
Quick answers
Is it free? Yes, completely.
Are my photos uploaded? No. Everything runs in your browser.
Can I use it for logos? Yes — Auto detects black-and-white artwork and keeps it crisp.
Ready? Open the free Photo to Laser Engraving tool and make your first file.