
How to Use Parametric Laser Cut Models: Custom Size and Thickness, Step by Step
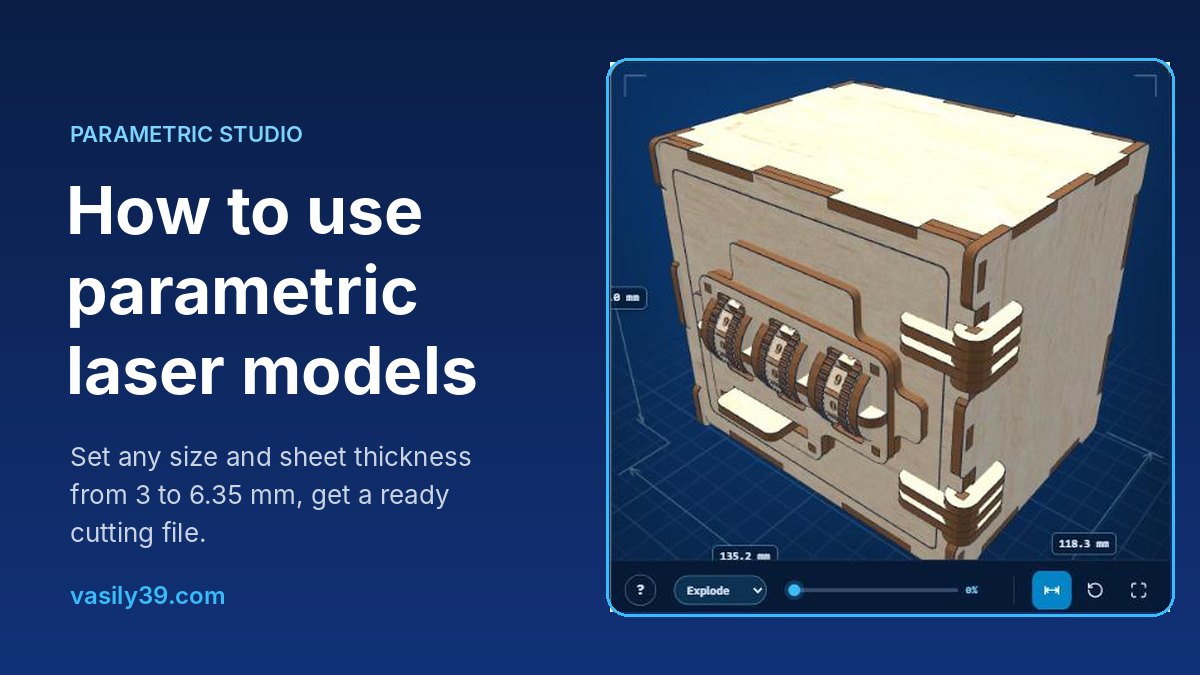
Most laser files come in one size and one material thickness. If your box needs to hold something specific or your plywood is 4 mm instead of 3 mm, you have to redraw every joint by hand. Parametric models solve this: you type the size you need, pick your sheet thickness, and the site draws a new cutting file for you — every finger joint, slot and gap recalculated. This guide walks you through the whole process, from choosing a model to cutting it.
What “parametric” means
A normal SVG is a fixed drawing. A parametric model is a set of rules: “the side is as tall as the box, the tabs are as deep as the sheet is thick, the lid is half a millimetre larger than the base”. When you change a number, the rules redraw every part so they still fit together. You can make the same box for a deck of cards or for a set of brushes, in 3 mm plywood or in 6 mm MDF — all from one model.
Every parametric model on the site works with any sheet thickness from 3 mm to 6.35 mm (1/4"), and the size of each part is calculated in the browser so you see the result in 3D before you download anything.
Step 1. Choose a model
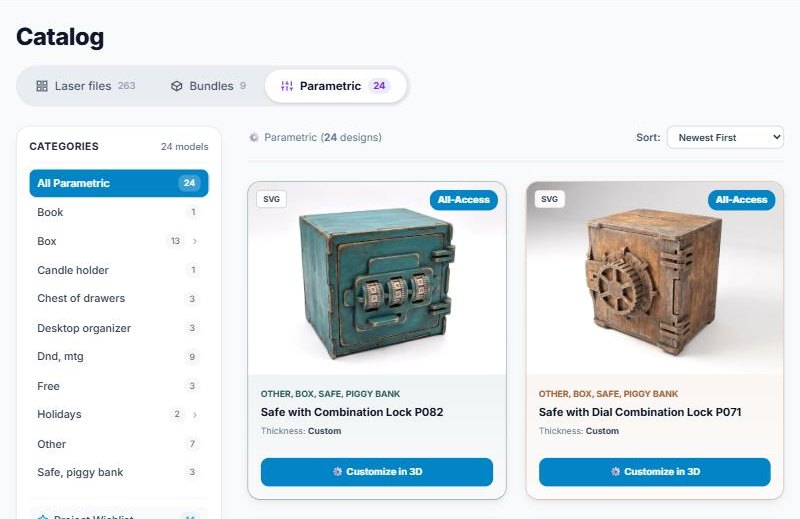
Open Catalog → Parametric. Each card shows the model and a Customize in 3D button. Models marked Free can be downloaded by anyone; models marked All-Access need an access key (see the end of this guide). A good way to start is one of the free models: Parametric Box P002, Tray P004 or Grid Dividers P001.
Step 2. Get to know the studio
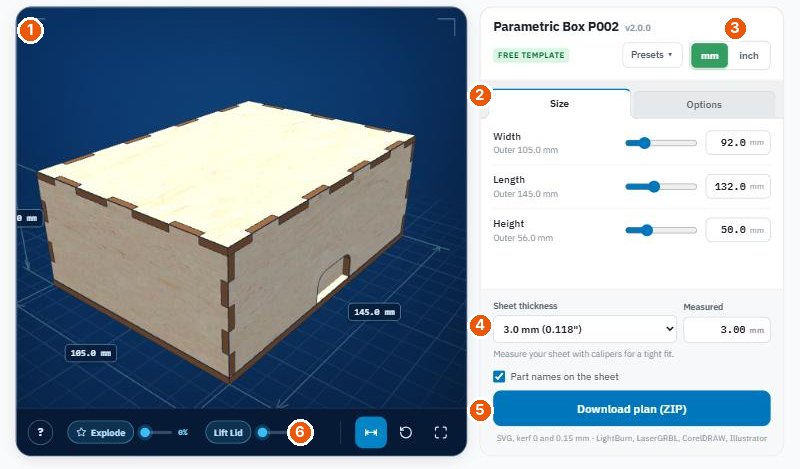
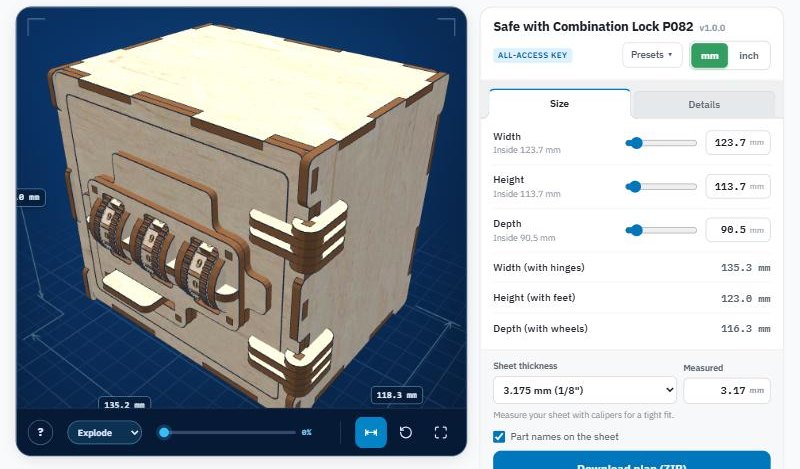
The studio has two parts: a live 3D preview on the left and the settings panel on the right. The numbers on the picture above mean:
- 3D preview — the model exactly as it will be cut, with the overall dimensions shown on the edges. It updates as soon as you change a value.
- Settings tabs — Size plus one or more tabs with options. Complex models have more tabs (for example Details, Lid, Drawers).
- mm / inch — switches all values between millimetres and inches.
- Sheet thickness — the material you are going to cut.
- Download plan (ZIP) — builds your personal cutting file.
- Viewer controls — explode the model, open the lid, show or hide dimensions, reset the view, full screen.
Step 3. Set the size
On the Size tab, move a slider or type an exact value into the field next to it and press Enter. You can type a comma or a dot — both work.
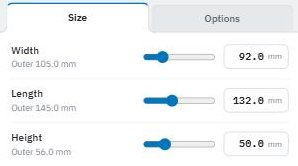
Inside or outside? The value you enter is the inside size — the free space for your things. The grey line under it shows the resulting outside size, which includes the material thickness. So if you need a box for 90 × 130 mm cards, enter the card size plus a little room (for example 92 × 132 mm), and the studio tells you how big the box will be outside.
Some models also show read-only lines such as Width (with hinges) or Height (with feet). These are the full dimensions including parts that stick out, so you know how much space the finished piece will take on a shelf.
Step 4. Choose the sheet thickness
Pick your material from the list: 3, 3.175 (1/8"), 3.6, 3.8, 4, 4.5, 5, 5.5, 6 or 6.35 mm (1/4"). All joints, slots and tabs are rebuilt for that thickness.
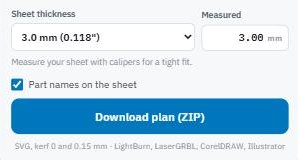
Measure your sheet. Plywood sold as 3 mm is often 2.8 or 3.2 mm, and that is enough to make joints loose or too tight to assemble. Measure the sheet with calipers in a few places and type the real value into Measured. The file is then drawn for your real material, not for the number on the label.
Part names on the sheet adds a small label under every part (for example “Base Front [98.0 × 50.0 mm]”). The labels are on a separate layer, so you can switch them off in your laser software or untick the box before downloading.
Step 5. Options and presets
The other tabs hold the options of the particular model. On the box P002, for example, Lid gap sets how much larger the lid is than the base (0.5 mm by default — increase it if the lid is too tight), and Cutouts switches the finger notches for lifting the lid on or off. A safe has options for the engraved digits, a chest of drawers for the number of rows and drawers, and so on. Every option is applied to the 3D preview immediately.
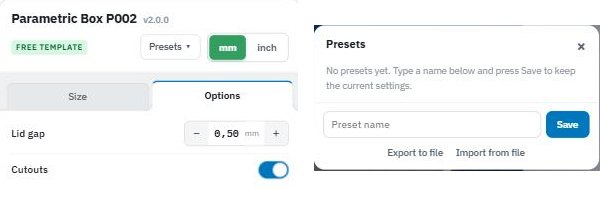
Presets remember your settings. Type a name and press Save — next time you can load the same size and options with one click. Export to file saves the settings as a small file you can keep or send to a friend; Import from file loads it back.
Step 6. Check the model in 3D
Before you cut, take a minute to look at the model from all sides:
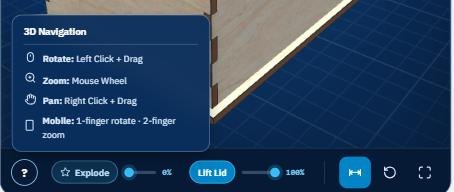
- Rotate — drag with the left mouse button. Zoom — mouse wheel. Pan — drag with the right mouse button. On a phone: one finger to rotate, two fingers to zoom.
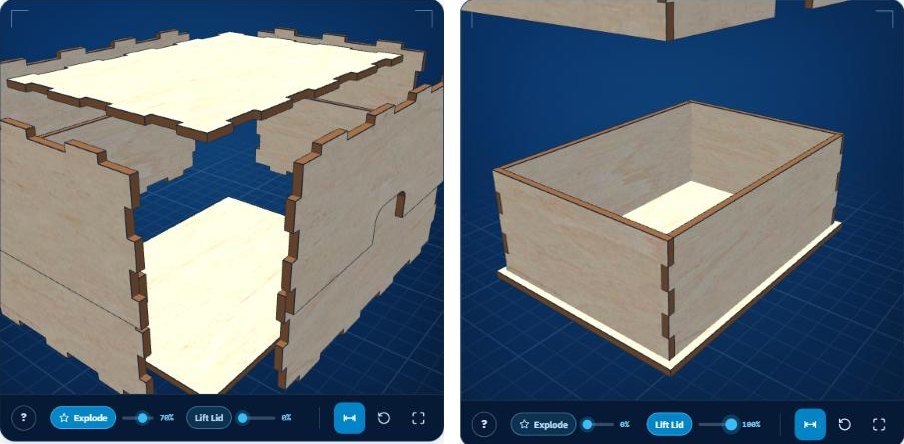
- Explode — pulls the parts apart so you can see how they join. Models with moving parts have a list here instead, for example Explode / Open door / Unlock on the safe.
- Lift Lid — opens the lid to show the inside.
- The buttons on the right show or hide the dimensions, reset the camera and open the preview in full screen. The ? button shows these controls.
Step 7. Download the cutting file
Press Download plan (ZIP). The server builds the file for your exact settings — a progress bar under the button shows the steps, and for big models it may take a few seconds. The archive is named after the model and the thickness, for example parametric_box_p002_3.0mm.zip, and contains:
- kerf_0 — the SVG drawn exactly to size, with no kerf compensation.
- kerf_0.15 — the same SVG with 0.15 mm kerf compensation: outlines are 0.075 mm larger and holes 0.075 mm smaller on each side, so joints come out tighter.
- readme.txt with the size, thickness and parameters you chose, and assembly instructions and a picture when the model has them.
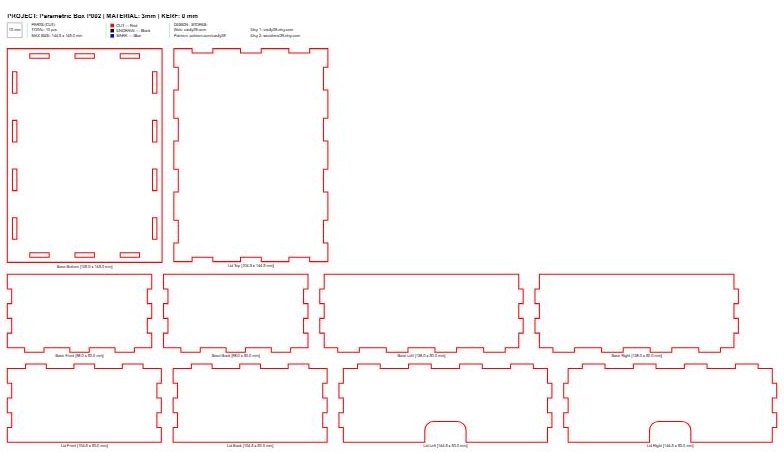
The top of every sheet shows the project, the material and the kerf, the number of parts, the largest part and the colour legend: red — cut, black — engrave, blue — mark. The 10 mm square in the corner is a size check.
Step 8. Cut it
- Import the SVG into LightBurn, LaserGRBL, RDWorks, CorelDRAW or Illustrator. Do not scale it. Measure the 10 mm square — if it is not exactly 10 mm, the import settings of your software are wrong (usually the DPI or units).
- Choose the kerf version. A CO2 laser usually burns away 0.1–0.2 mm, so kerf_0.15 gives snug joints on most machines. Use kerf_0 if your laser has a very thin beam, if you set kerf offset in your software yourself, or if the joints from kerf_0.15 are too tight.
- Set the layers: red for cutting, black for engraving, blue for light marking.
- Cut one small joint as a test before cutting the whole sheet — it costs a minute and can save a whole sheet of plywood.
Free and All-Access models
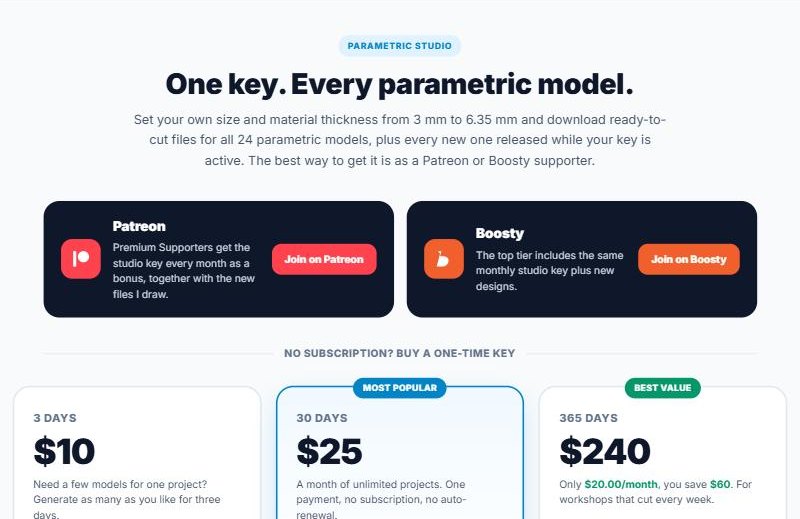
Free models can be downloaded right away. All-Access models need an access key — one key opens every parametric model on the site, including new ones released while it is active. You can get it as a Patreon or Boosty supporter (the key comes every month as a bonus) or buy a one-time key without a subscription for 3 days, 30 days or a year on the access page. To unlock a model, click Enter code or e-mail in the studio and type your key.
Troubleshooting
- Joints are loose: type the real thickness into Measured, or switch from kerf_0 to kerf_0.15.
- Joints are too tight: check Measured again, or cut the kerf_0 version.
- The lid does not fit: increase Lid gap a little (for example from 0.5 to 0.7 mm).
- Parts are the wrong size after import: the file was scaled. Re-import without scaling and check the 10 mm square.
- A part does not fit your laser bed: the largest part is printed at the top of the sheet — reduce the size, or move the parts in your laser software.
Quick answers
Can I sell what I make? Yes, you can sell the finished products. Reselling or sharing the files themselves is not allowed.
Which software do I need? Any program that opens SVG: LightBurn, LaserGRBL, RDWorks, xTool Creative Space, CorelDRAW, Illustrator, Inkscape.
Can I go back to a size I used before? Yes — save it as a preset, or export it to a file.
Ready to try? Start with the free Parametric Box P002 or browse all parametric models.